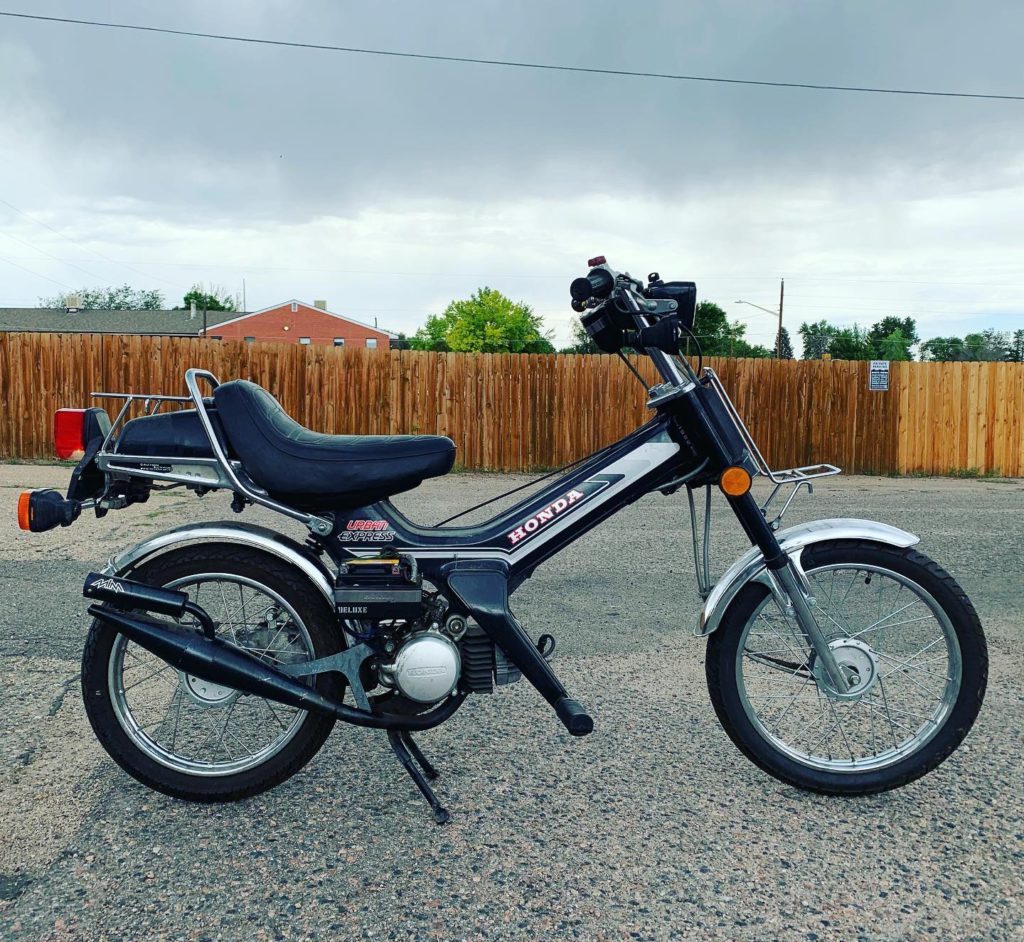
Building an ’82 Honda Urban Express
I bought an ’82 Honda Urban Express (NU50) earlier this year to match my lady’s ’81 Honda Express (NC50).
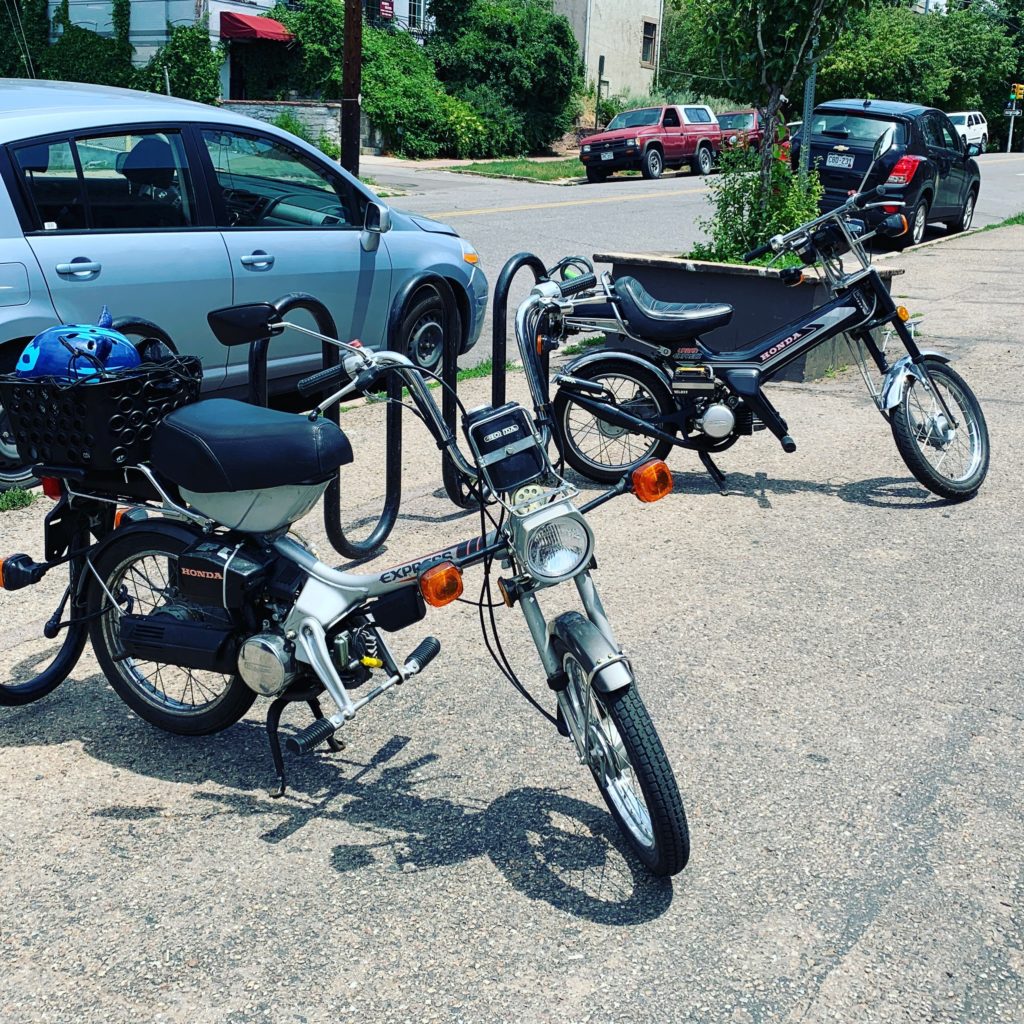
There they are together in front of a pizza joint near Cheeseman Park.
A Less-Than-Blank Slate
It didn’t run when I bought it. I gave $400 for it because it had an MLM People’s pipe ($200) installed, and it was complete other than a missing airbox topper (unobtainium) and airbox (also unobtainium).
I ordered a Dellorto SHA 15 carb and manifold along with the “Stocko Shocko” kit from treatland.tv.
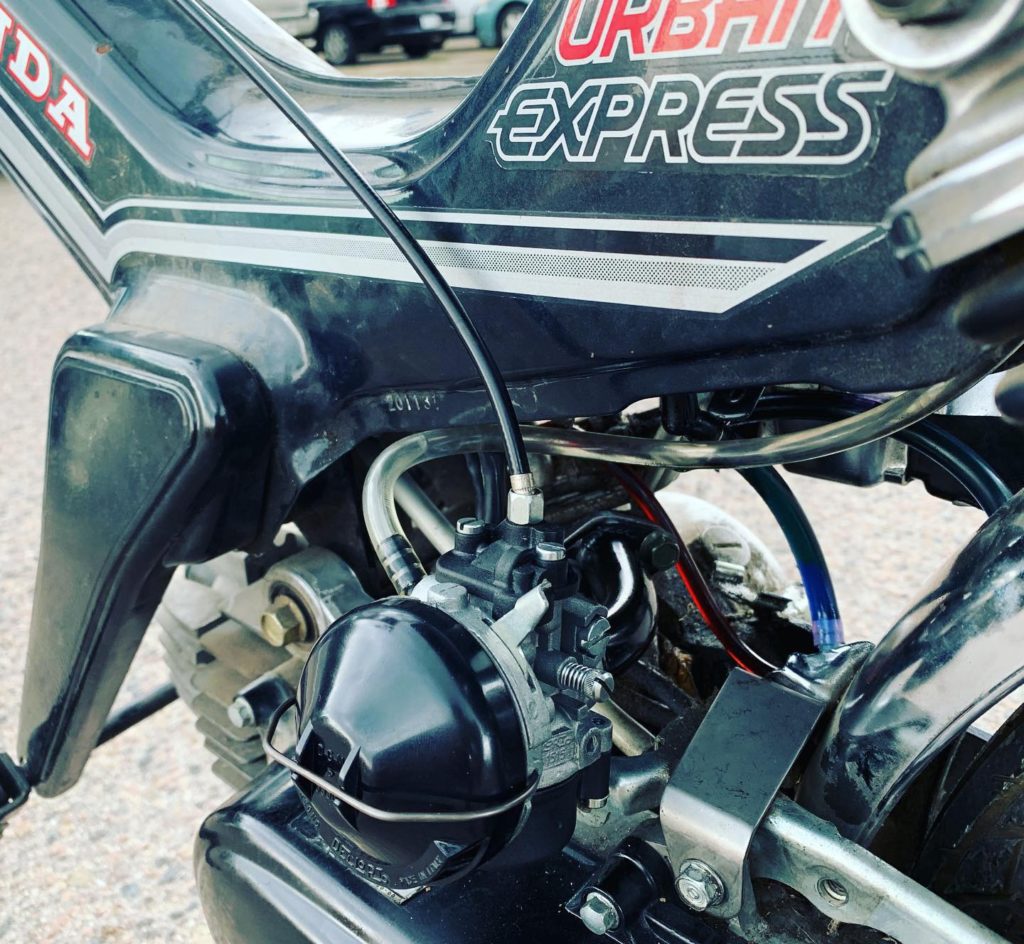
It ran OK after installing the carb, but it didn’t feel like I thought it should. A compression test resulted in a whopping 106psi, so I ripped the top end apart.
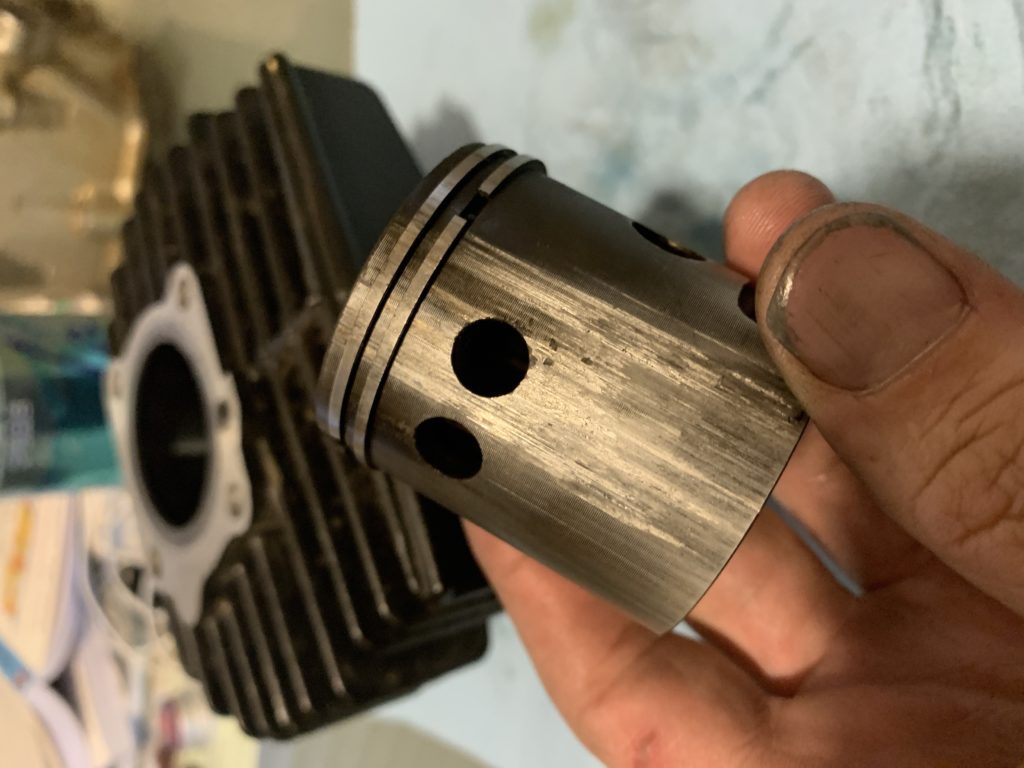
I found a funky aluminum cylinder with a 44mm sleeve installed. And this piston, which has seen better days. I installed the “Stocko Shocko” kit in its place. The kit consists of a stock cylinder punched out to 44mm, 4mm bigger than stock. Mistakes were made.
“Stocko Shocko” Mistakes
- I didn’t bother to measure the ring gap.
- Or chamfer the ports.
- Or even break the thing in.
- No temp gauge
- I retained the stock head, which is trash, as you’ll see.
- I did do some plug chops, and all was well, so I figured I was good.
I did a top speed run on its second heat cycle. It soft seized after going down the other side of a huge hill about a week later. It then hard seized randomly downtown at low revs. I think my “mistakes” had a lot to do with the longevity of the cylinder and piston.
I’m used to scooters with forced-air cooling (fan + cooling shrouds, like an old Porsche 911), and I’ve never had one seize up on me. Never had an air or liquid cooled 2-stroke dirtbike or GP bike seize up on me, either. I usually chamfer ports and measure ring gaps, but I don’t bother trying to break them in. I think mopeds are a bit finicky owing to their smaller size and lack of forced-air cooling.
Tear Down and Rebuild
I pulled it apart again. Piston and cylinder were both scored; time for a new piston and cylinder.
I got the DR kit from Treatland, ordered it with a bunch of “fixings” too: Puch/Honda “super street” head, cylinder studs, temp gauge, gaskets, oil block-off plug, jets, etc.
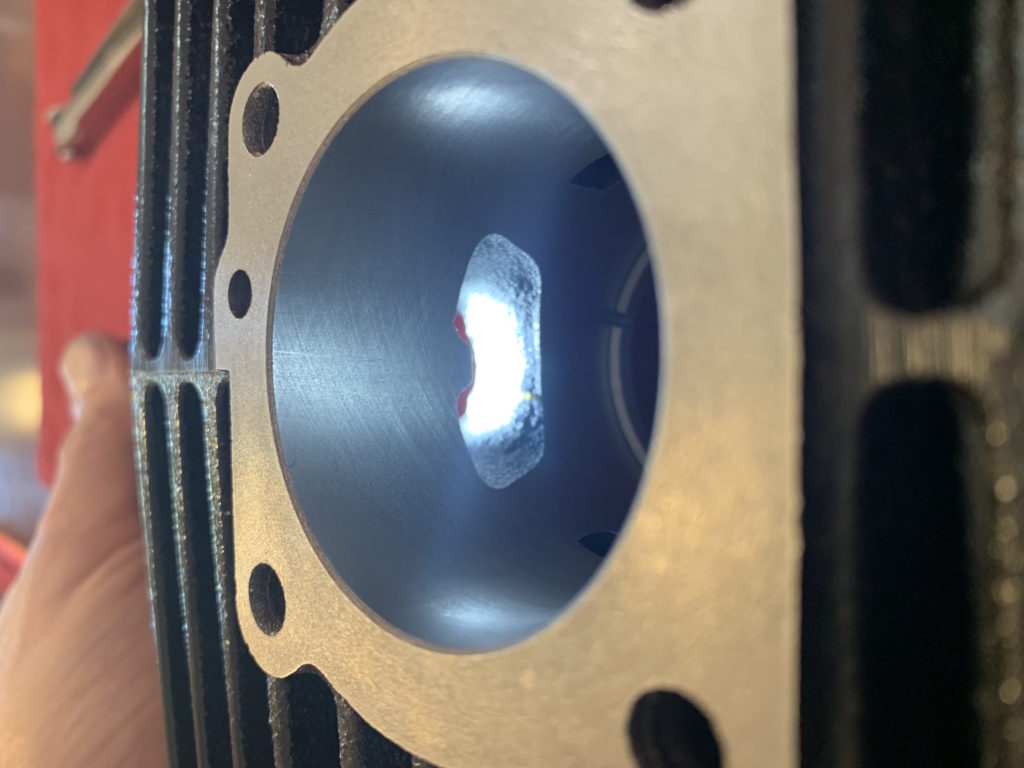
Check out the exhaust port on the new cylinder:
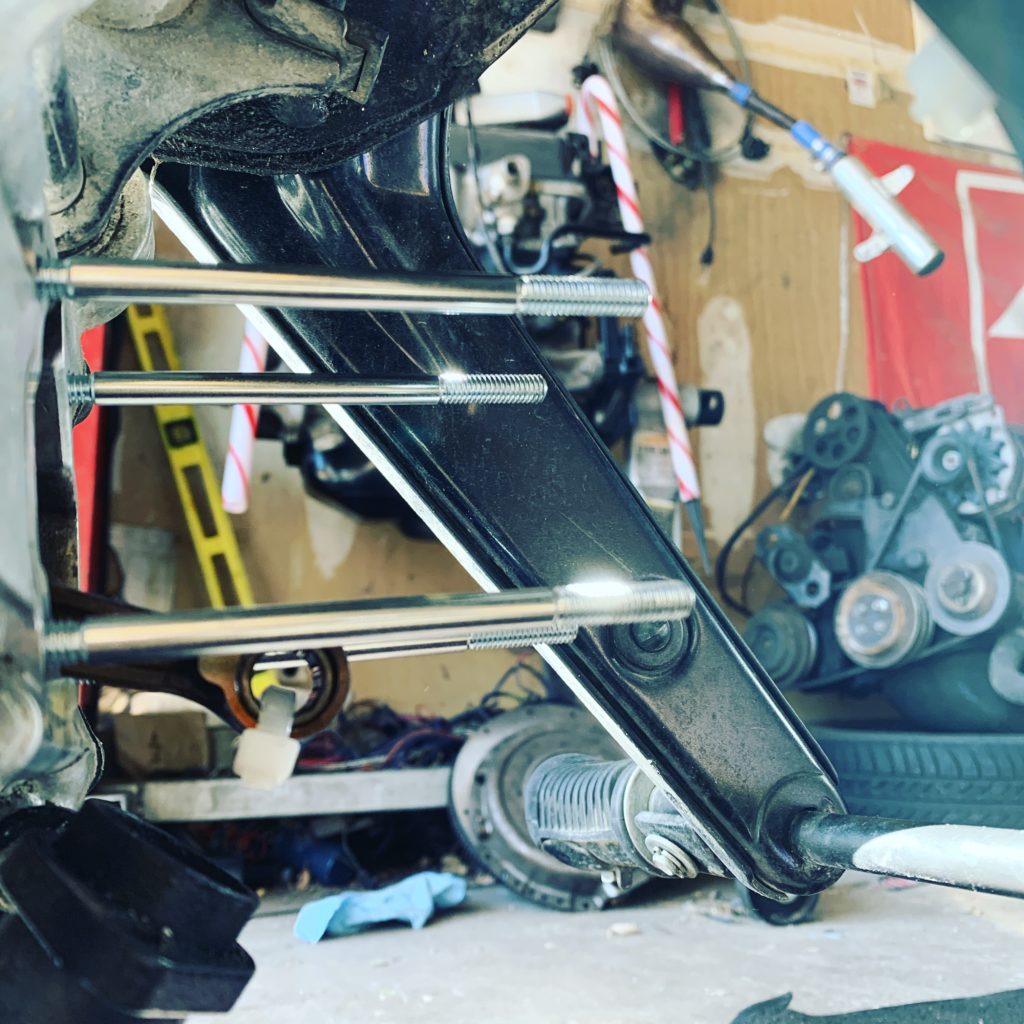
The new cylinder head isn’t as tall as the old one, so I had to install 106mm Polini studs.
They’re shorter than the stock head bolts by a few millimeters, and I didn’t want to “cobble” shit together with spacers I had lying around. I have a thing for nice hardware on my bikes, even if I’m the only person who knows it’s there.
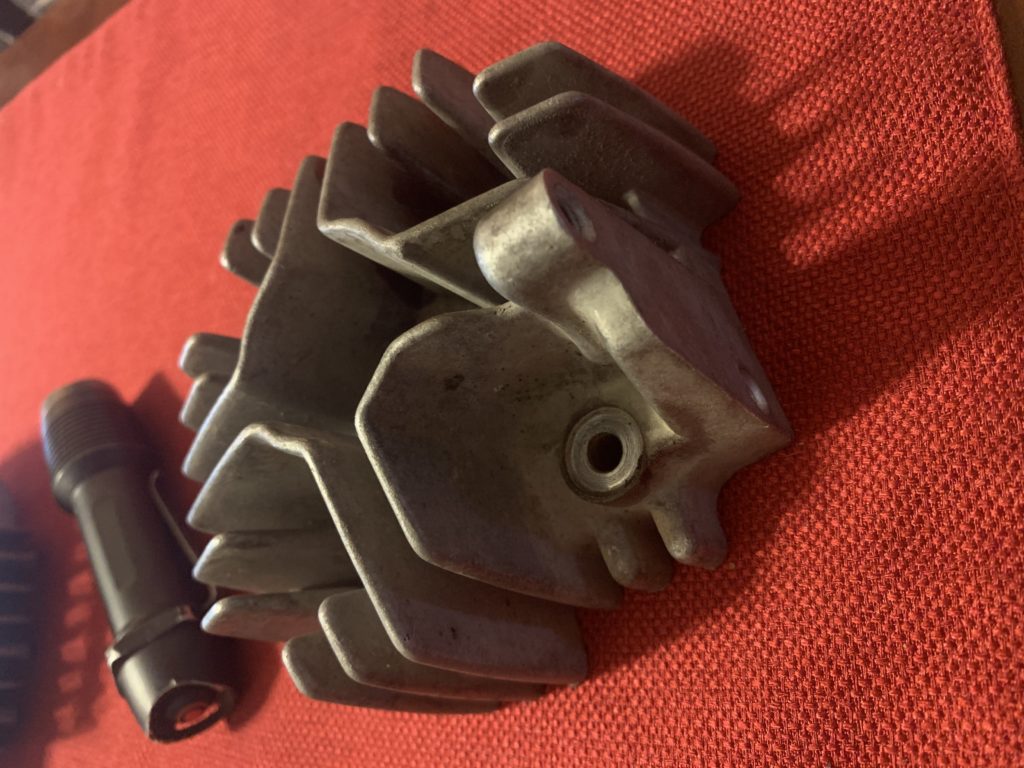
The stock head is garbage. I removed the janky temperature-activated choke mechanism (I HATE AUTOCHOKES) when the Dellorto carb went on. Just look at this thing. It’s pathetic.
WordPress likes to randomly flip my images and not let me flip them back. Lame but you get the idea. Here’s the new head. LOTS more material.
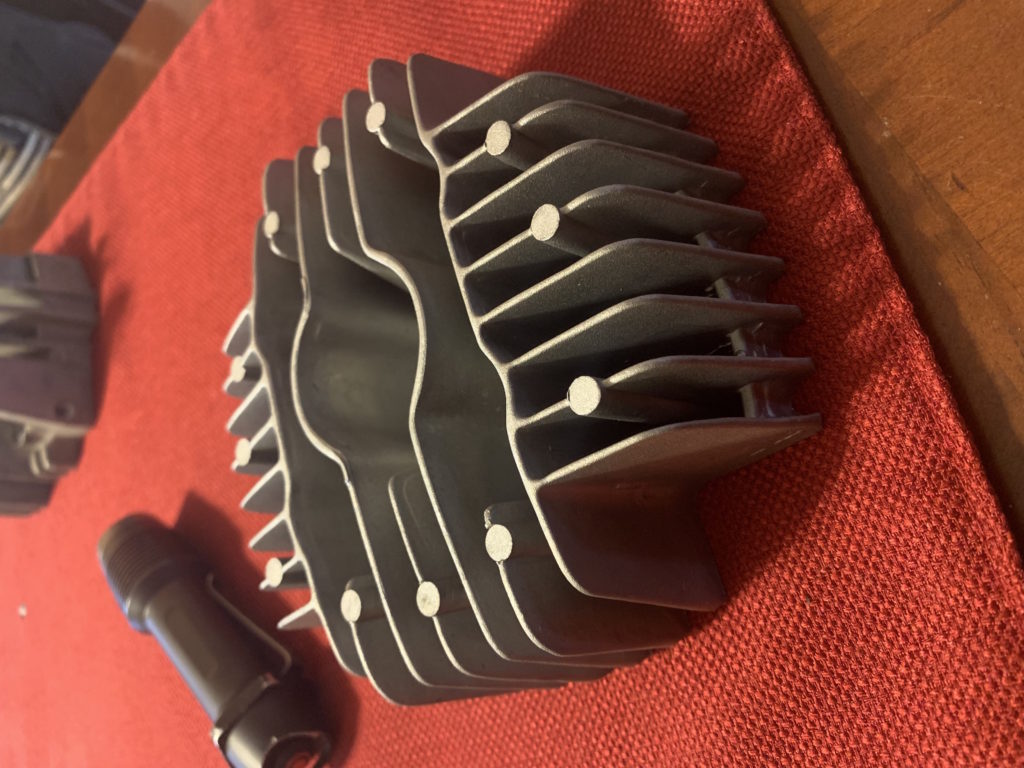
18 cooling fins vs. 28. Heat dissipation is all about surface area. New head has LOTS more surface area. Should stay a lot cooler.
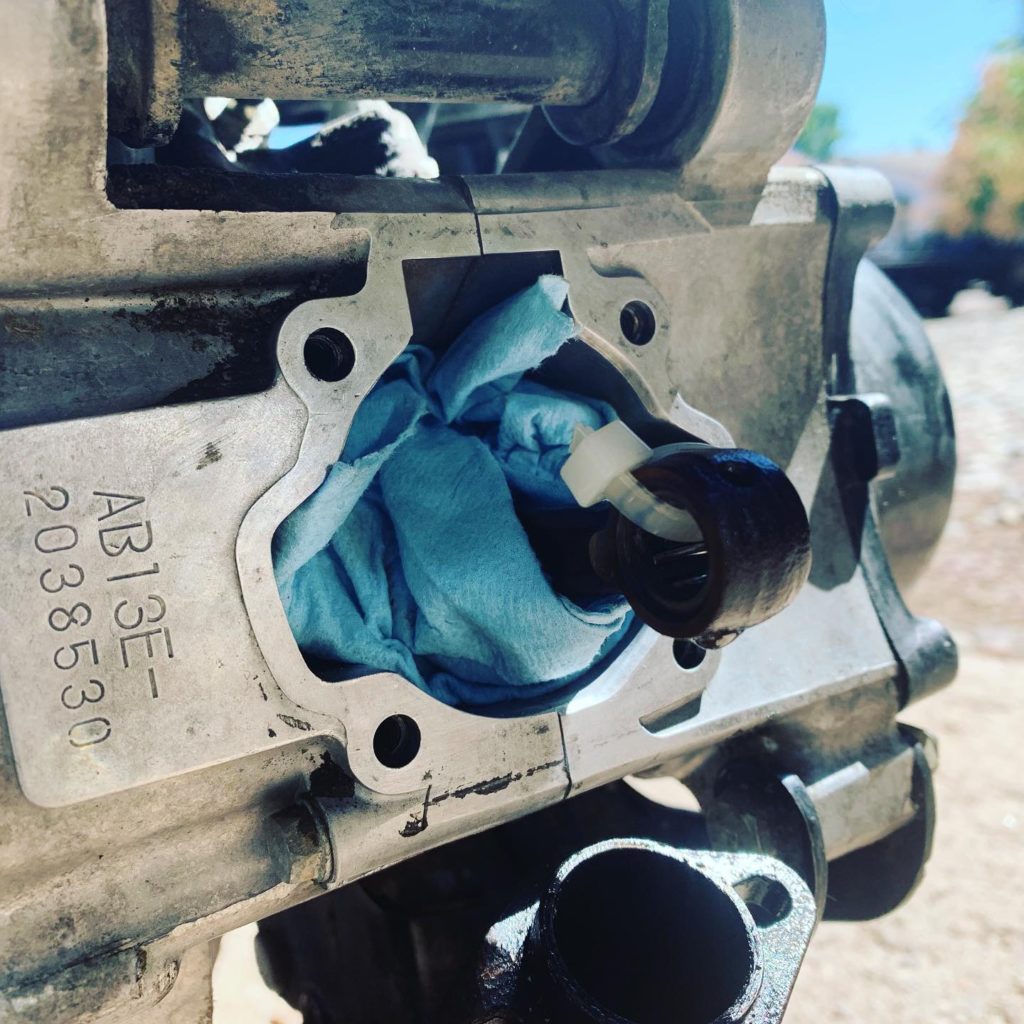
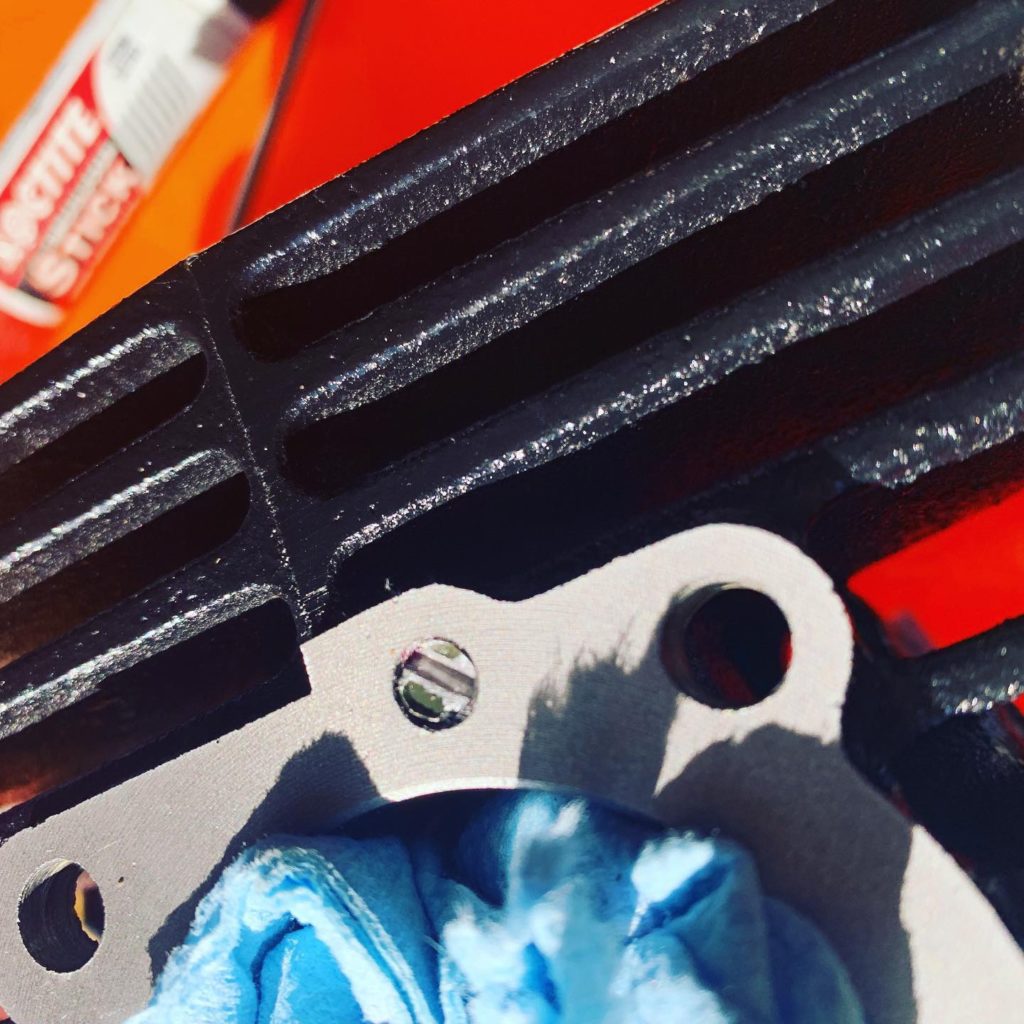
Plugging the Decomp Hole
The later Express nopeds use the same top end parts as the old Honda Camino/Hobbit mopeds. The Camino/Hobbit cylinder and head have a hole in them for a decompression valve. The hole on the cylinder needs to be plugged, or the head gasket weeps oil.
Some people are intimidated by this. It’s not hard at all. Start by running a 5mm drill bit through the hole. Then run an M6 tap through the hole.
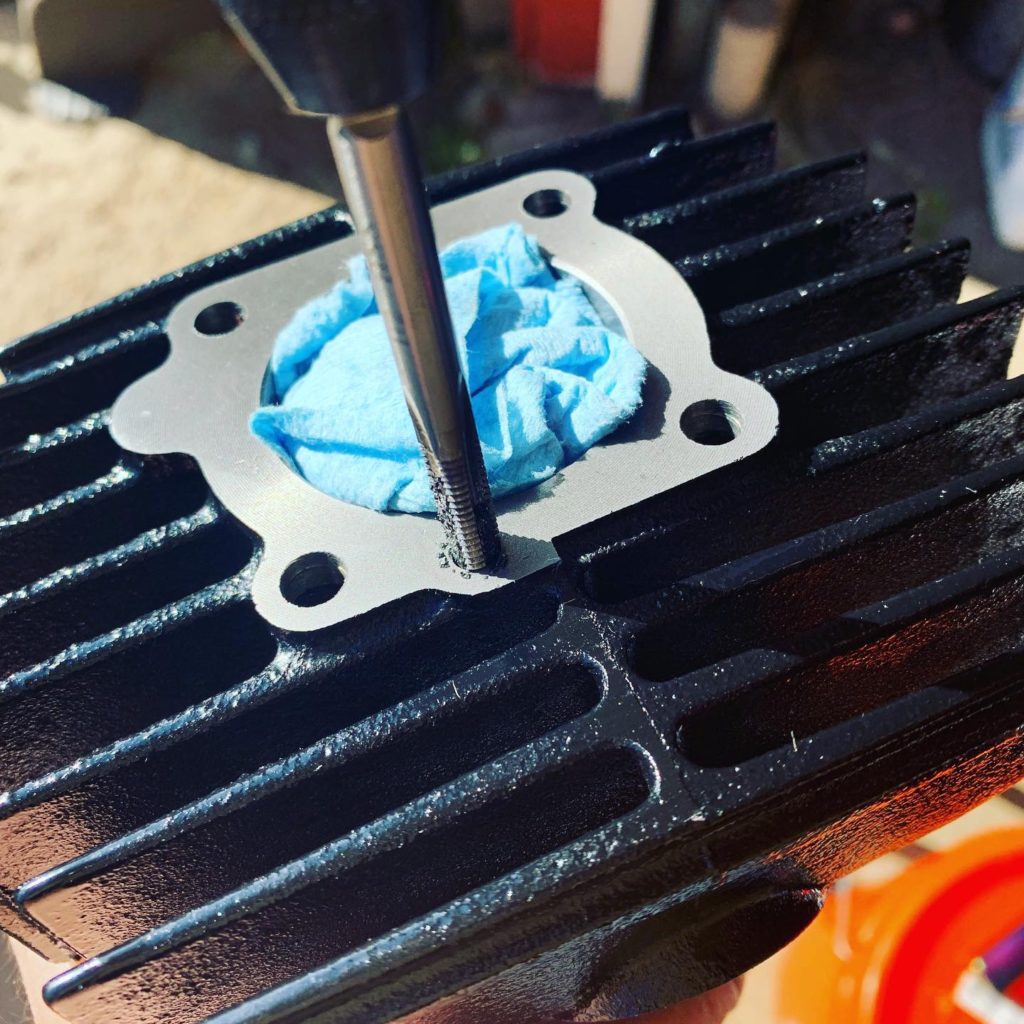
Cut the threads off of an M6 fastener, cut a slot in its end, and insert w/ red Loctite.
Bolting Everything Together
These bikes are cake to work on. Everything went together easily.

I would not have bought this bike had it not had a pipe installed, so here’s a totally unnecessary pic of the thing. I think it looks cool.
First Start, First Rides
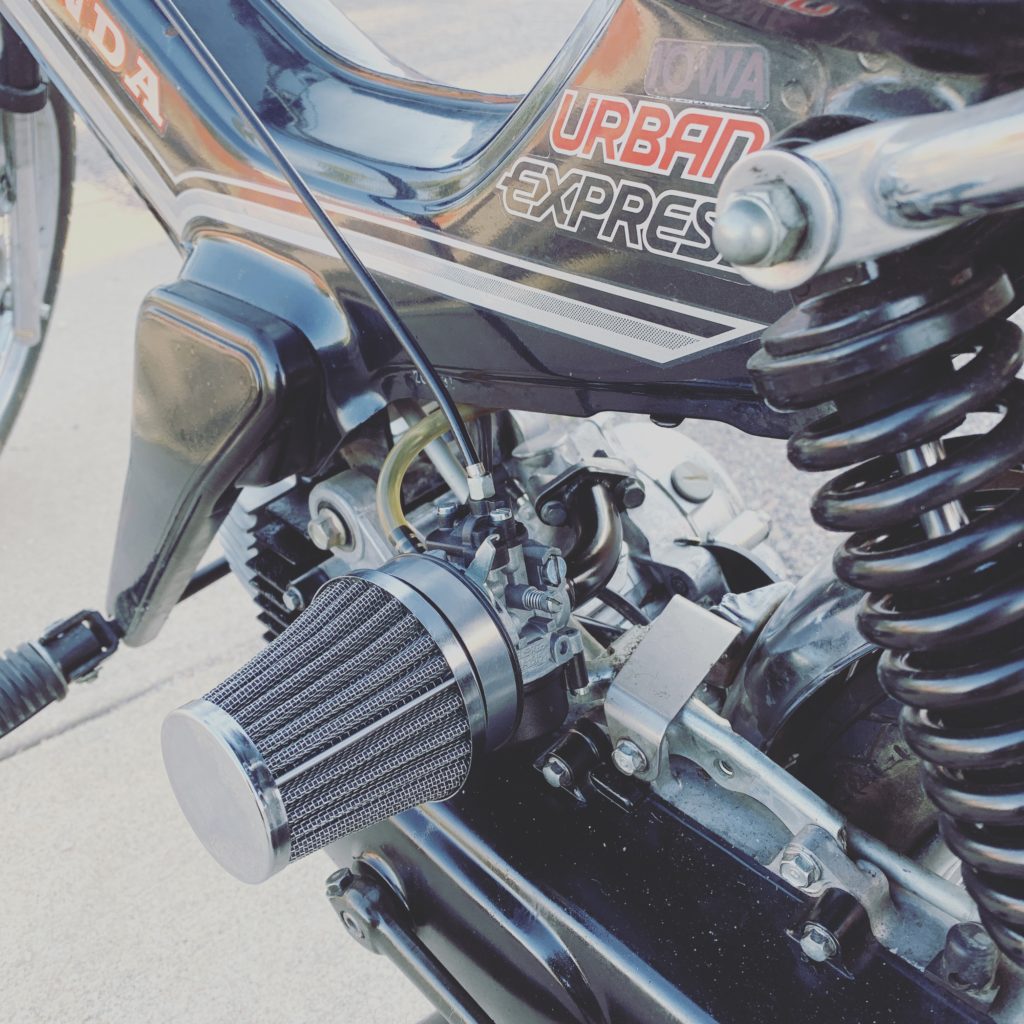
I started with a larger jet than I thought I would need, a 75 main. The bike didn’t want to run very well at all, so I jetted down and played with the air filter.
I ended up with a 65 main, no air filter, and a bunch of holes in the stock air filter cover. I popped by the local motorbike parts superstore for a 54mm EMGO filter; looks hilarious on the bike.
Queue up the break-in process. Start, idle, cool down times 5. Slow ride times 5. Faster ride, varying revs, times 5. It took a few days before I could ride it like a real bike.
The pipe wouldn’t hit with the 9g rollers I had installed, so I swapped them for some 5g rollers I had lying around. That made the pipe hit at 12-15mph. Swapping the B5HS plug for a B7HS plug made it hit closer to 12mph more consistently.
Highest temp I’ve seen on the gauge is ~400 degrees. It’s been cooler outside here. I was expecting to see higher temps. Plug chops at high RPMs reveal a perfect coffee-colored electrode, so I think I’m good on jetting.
UPDATE: Clutch Tuning
There was a shiny new GY6 “racing” clutch in my mailbox yesterday. I got excited and installed it. I managed to remove the 38mm nut from the clutch using vice grips and a strap wrench. It was such a PITA I ordered a 38mm socket from Amazon to use with my impact.
The clutch came fitted with the tiny yellow springs. A set of red Malossi springs are on the way. I threw a yellow contra spring (the big one) in the clutch assembly before installing it on the bike.
Now the pipe hits at 10mph, but it’s PAINFULLY SLOW getting there. The poor 5g rollers don’t have enough “oomph” to pull the belt lower on the clutch pulley, so it only goes 25mph. The yellow contra spring is way too much.
I suspect the “hot ticket” is going to be 3-5g rollers (18-30g total), red Malossi springs, and the stock contra spring. That should make it take off fast and let the engine rev to 40mph+. I’ll keep yinz posted.
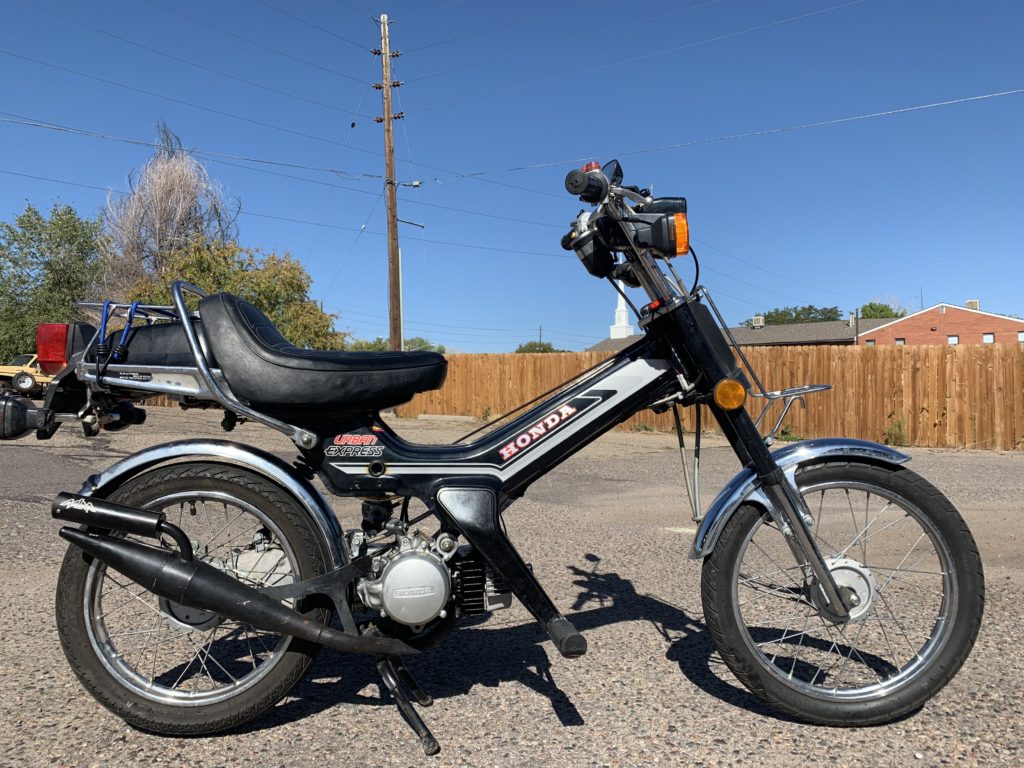
Before and After
Putting the battery under the seat and deleting the injection pump made a world of difference in how the bike looks.
Parts List
Engine
- Dellorto SHA 15.15, MLM intake, 65 main jet, 54mm EMGO filter
- 46mm DR cylinder/piston
- Puch/Honda head, B7HS plug
- MLM People’s pipe
- Oil-injection pump delete plug
- Trailtech temp gauge
- GY6 clutch w/ red Malossi springs
Chassis
- Oil reservoir delete
- Battery installed under seat
- New front brake pads
- New rear shock