Mobile Motorcycle Maintenance: Chain & Sprocket Removal & Replacement
To schedule an appointment, please BOOK ONLINE or try calling (720) 634-6935.
Let’s talk about what turns your wheels. Your rear wheel to be specific.
There’s a sprocket attached to your engine, called the countershaft sprocket. There’s a sprocket attached to your rear wheel as well. That one’s called the rear sprocket.
A chain connects them. When you smash the gas, the chain transfers the power from the engine to the rear wheel and you go go goooooo.
But let’s say you go go gooooooooo without thinking too much about your sprockets. What happens? This happens:
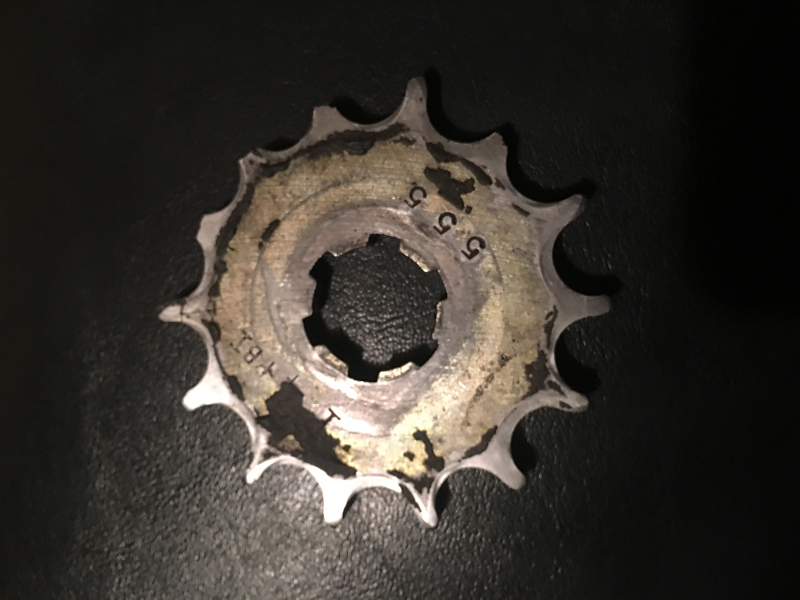
See that? That’s the countershaft, or front, sprocket from my ’78 Yamaha IT250 vintage racer. See how it’s missing a bunch of teeth? That’s bad.
Although I won a race on this sprocket, it’s a good idea to make sure your sprockets never, ever look like this. If your sprockets are missing teeth, or worn, or the teeth look more like tear-drops than teeth, it’s time to change them.
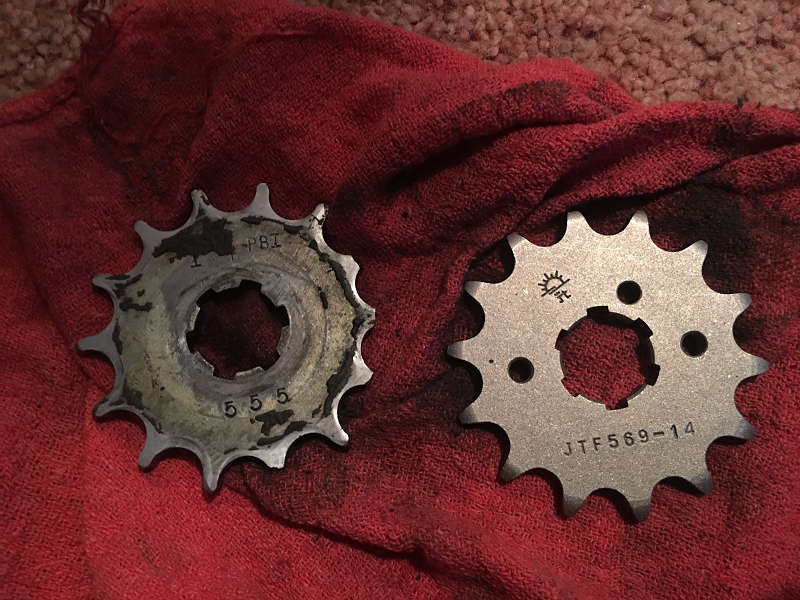
Old on the left, new on the right:
Chain and Sprockets: Removal and Replacement
How hard is it to change your chain and sprockets? It’s pretty easy. I’m about to show you how to do it. You’re going to need a few parts and tools:
- New sprockets and a new chain. I like to use stuff by JT Sprockets. They’ve been in business a long time. They do a good job. Top parts, in my opinion. Total cost for a new chain and sprockets for my vintage racer? About $60, which is less than it would cost me to make everything myself.
- An impact wrench. I use a 12V-powered unit “made by” Kawasaki. I have no idea who actually made this thing, but it runs on motorcycle batteries, so it rocks in my book. That and it works quite well for a <$50 impact.
- BIG sockets. The nut for the countershaft sprocket on my old Yamaha (ahem… Yamaturd) measures 32mm. The rear sprocket nuts measure 17mm.
- Chain cutter. You know the old saying? Measure twice, cut once? It goes double for motorcycle chains. Although you *can* add links to a chain if you mess up, you’re better off doing it right the first time.
- I like to order chains that are a little too long and then cut them down to fit. If you’re tempted to order another master link after you cut your chain too short, bite the bullet and order a new chain.
The front sprocket
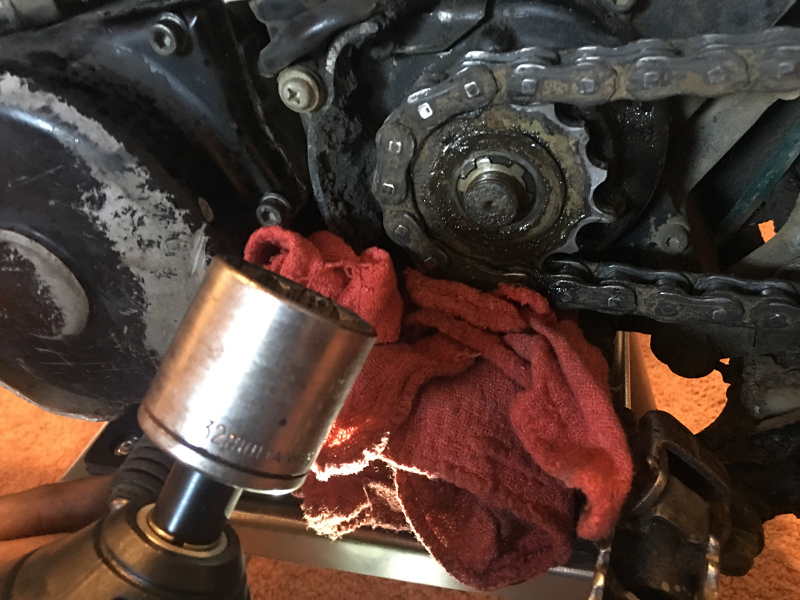
Start by having a good look at the countershaft sprocket. This is what mine looked like:
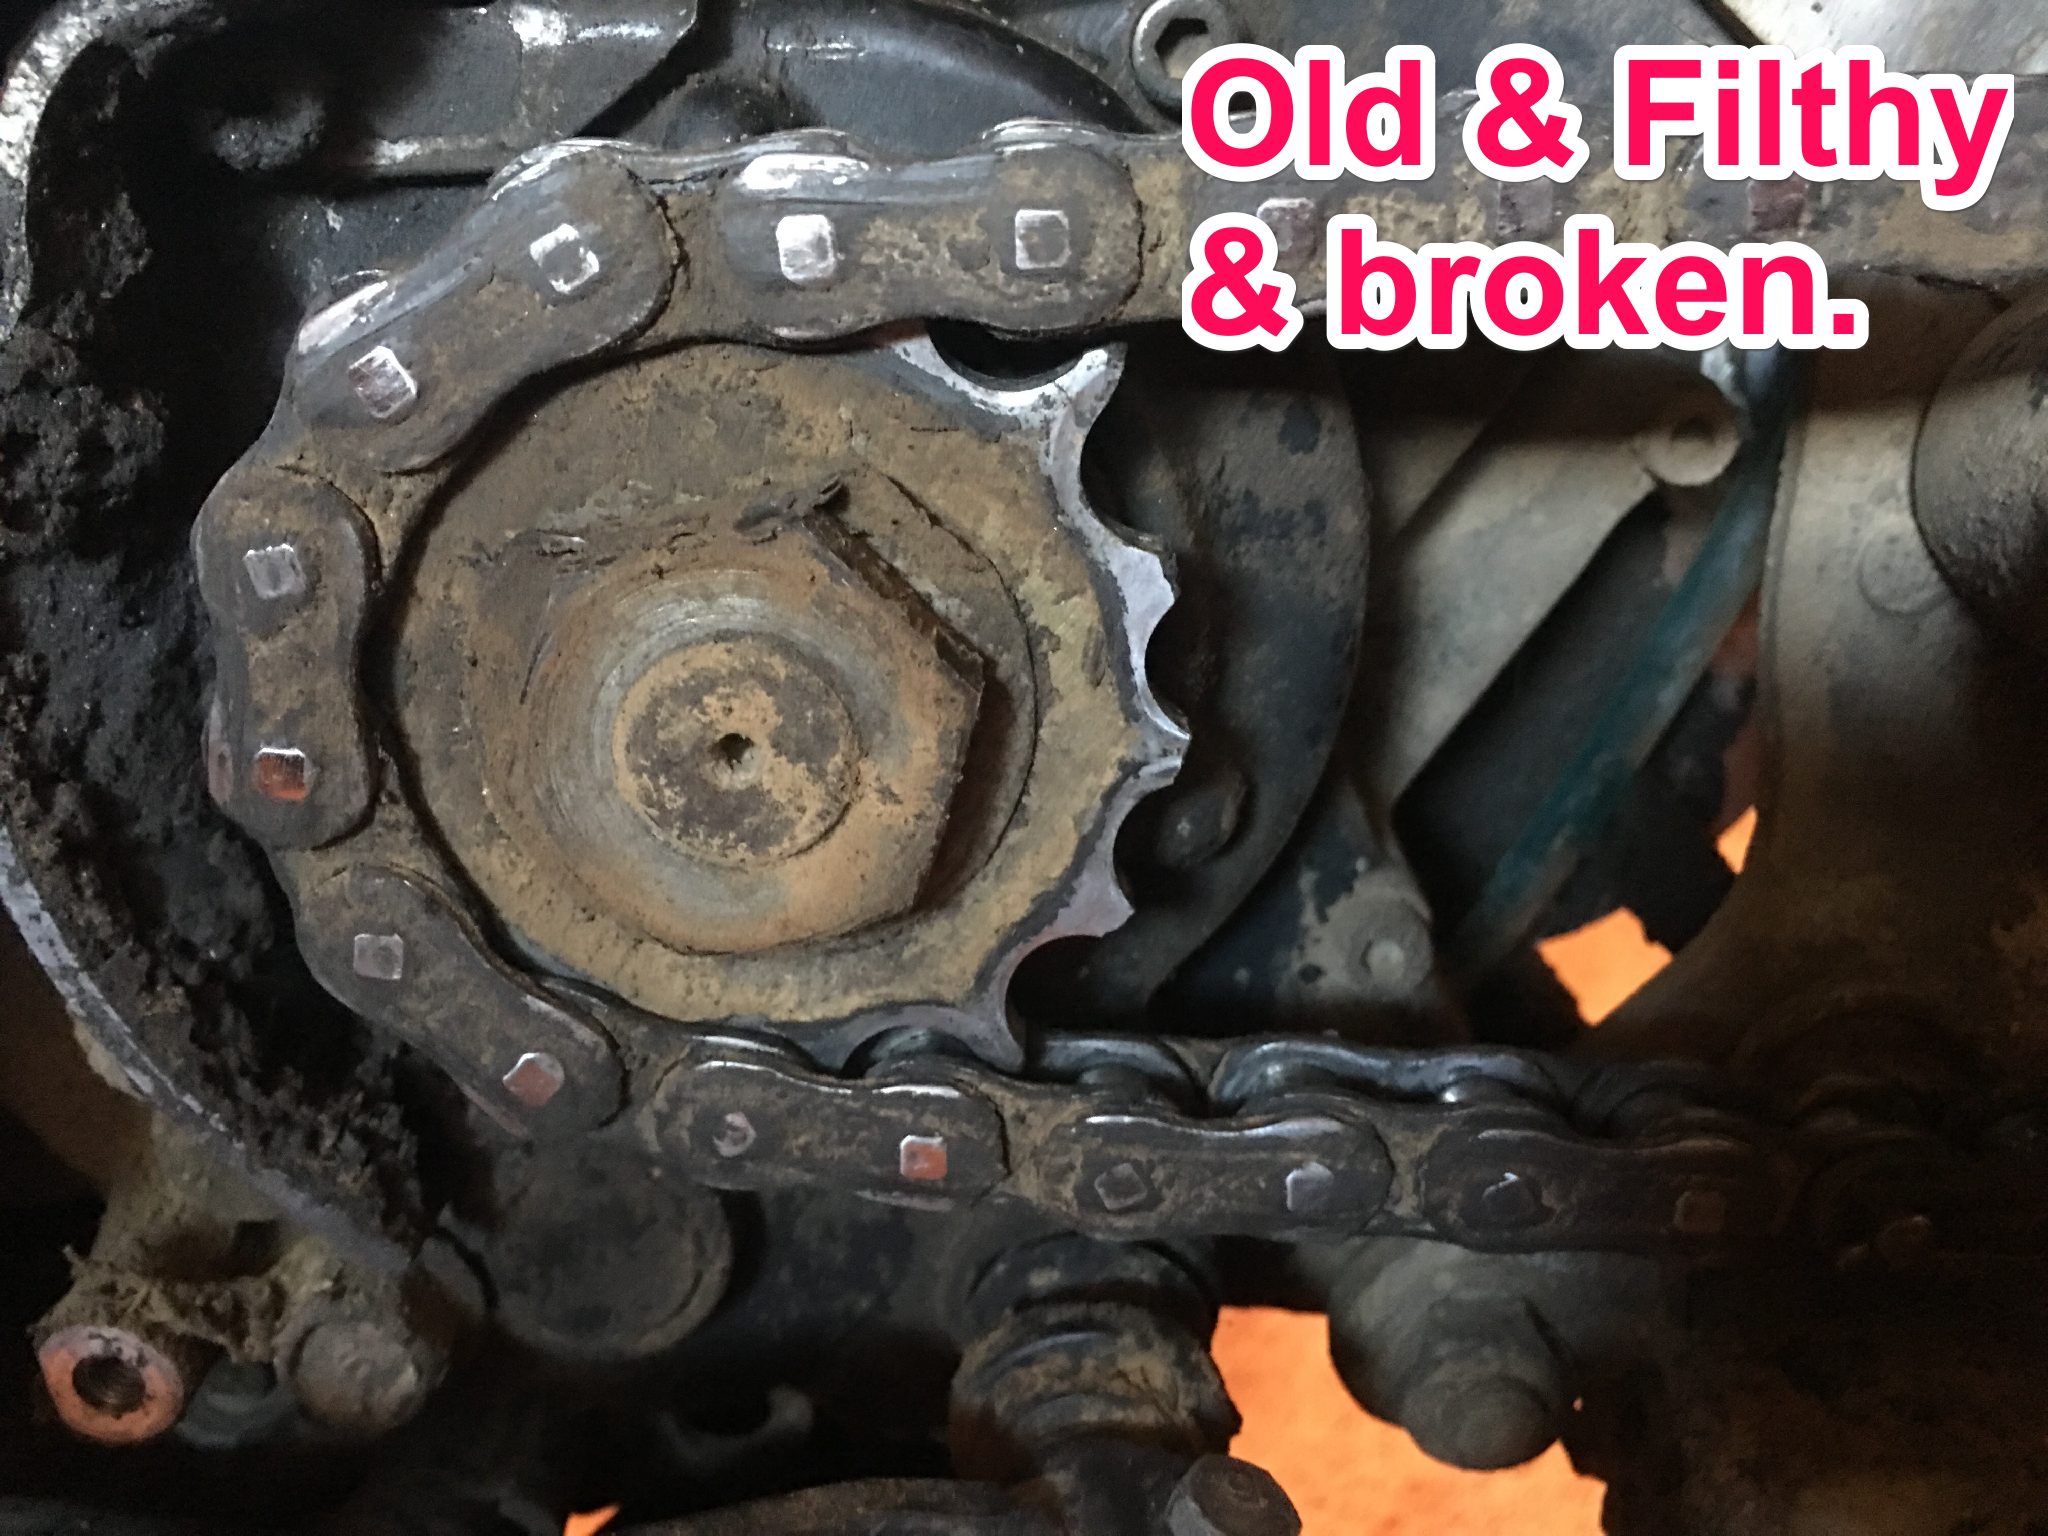
See the enormous nut on top of the sprocket? That thing has to come off, somehow, some way.
I like to start by shooting a little oil on it.
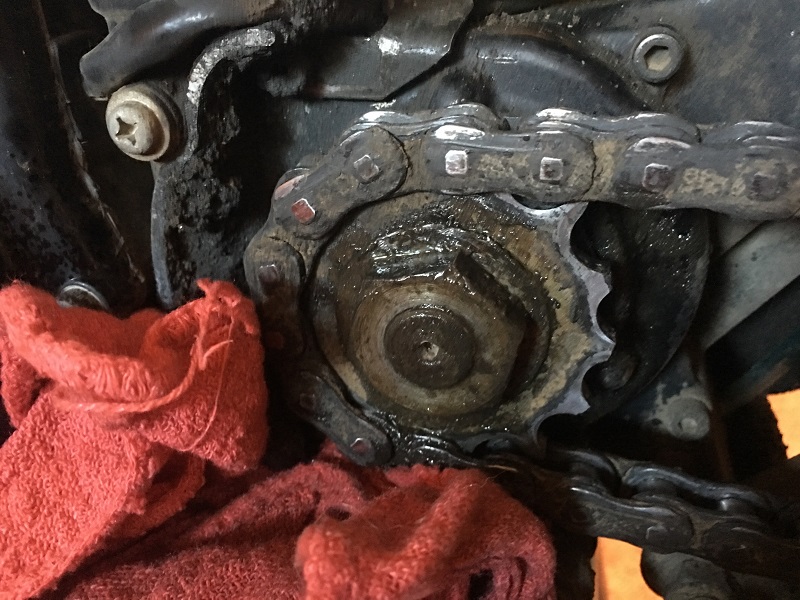
The oil helps loosen it up. It helps the parts slip past one another smoothly and easily. Oil is oil. WD-40 works fine. I used some cable lube I had hanging around.
The old IT250 we’re working on has a wide washer behind the nut. It was bent downward to help keep the nut in place. I used a small sledge hammer and a chisel to beat the washer out of the way.

With the washer out of the way, I test fitted a 32mm socket.
It fit well, so I proceeded with the impact wrench.
The impact spun the 32mm nut right off. Before I removed this nut, I put the bike in gear and made sure the drivetrain wouldn’t spin when I applied force to it. Let’s have a close look at that nut.
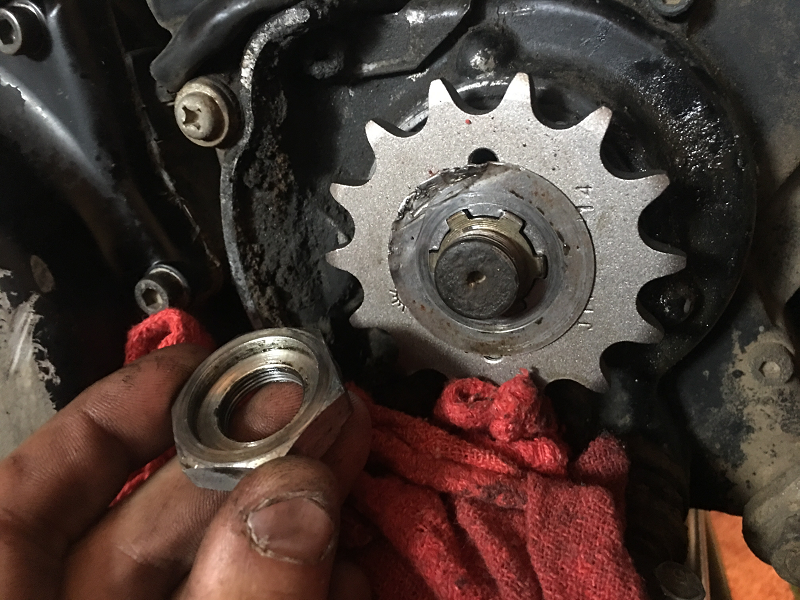
See how the nut has a recess cut into it? Good luck finding one of these at your local hardware store!
Even if you find a nut *like* it, you’re still going to have to beg a machinist to cut the recess into it. Don’t lose it or mess it up. If you lose this nut, or mess it up, you’re going to have a bad time.
It pays to be careful and use only as much force as you have to when working on motorcycles. If you jack the threads up, either on the nut or the “bolt” – the motorcycle’s output shaft – you’re in for a world of hurt.
Most old motorcycle parts are somewhat rare and quite difficult to fabricate if you have to make them from scratch. Be extremely careful when working on your motorcycle. Something as stupid as buggered threads on your transmission’s output shaft can ruin your weekend (or year), faster than you can say “@#$%-me-running, I need another one of these.”
Once you have that nut off, you need to remove the chain.
Removing the old master link
Chances are your chain has a master link. Break the master link free, and you can pull your chain off of the bike.

That’s the master link. Once you have the clip off, pull the link free from the chain.

As soon as you remove the old chain, you can focus your attention on the rear sprocket.
The rear sprocket
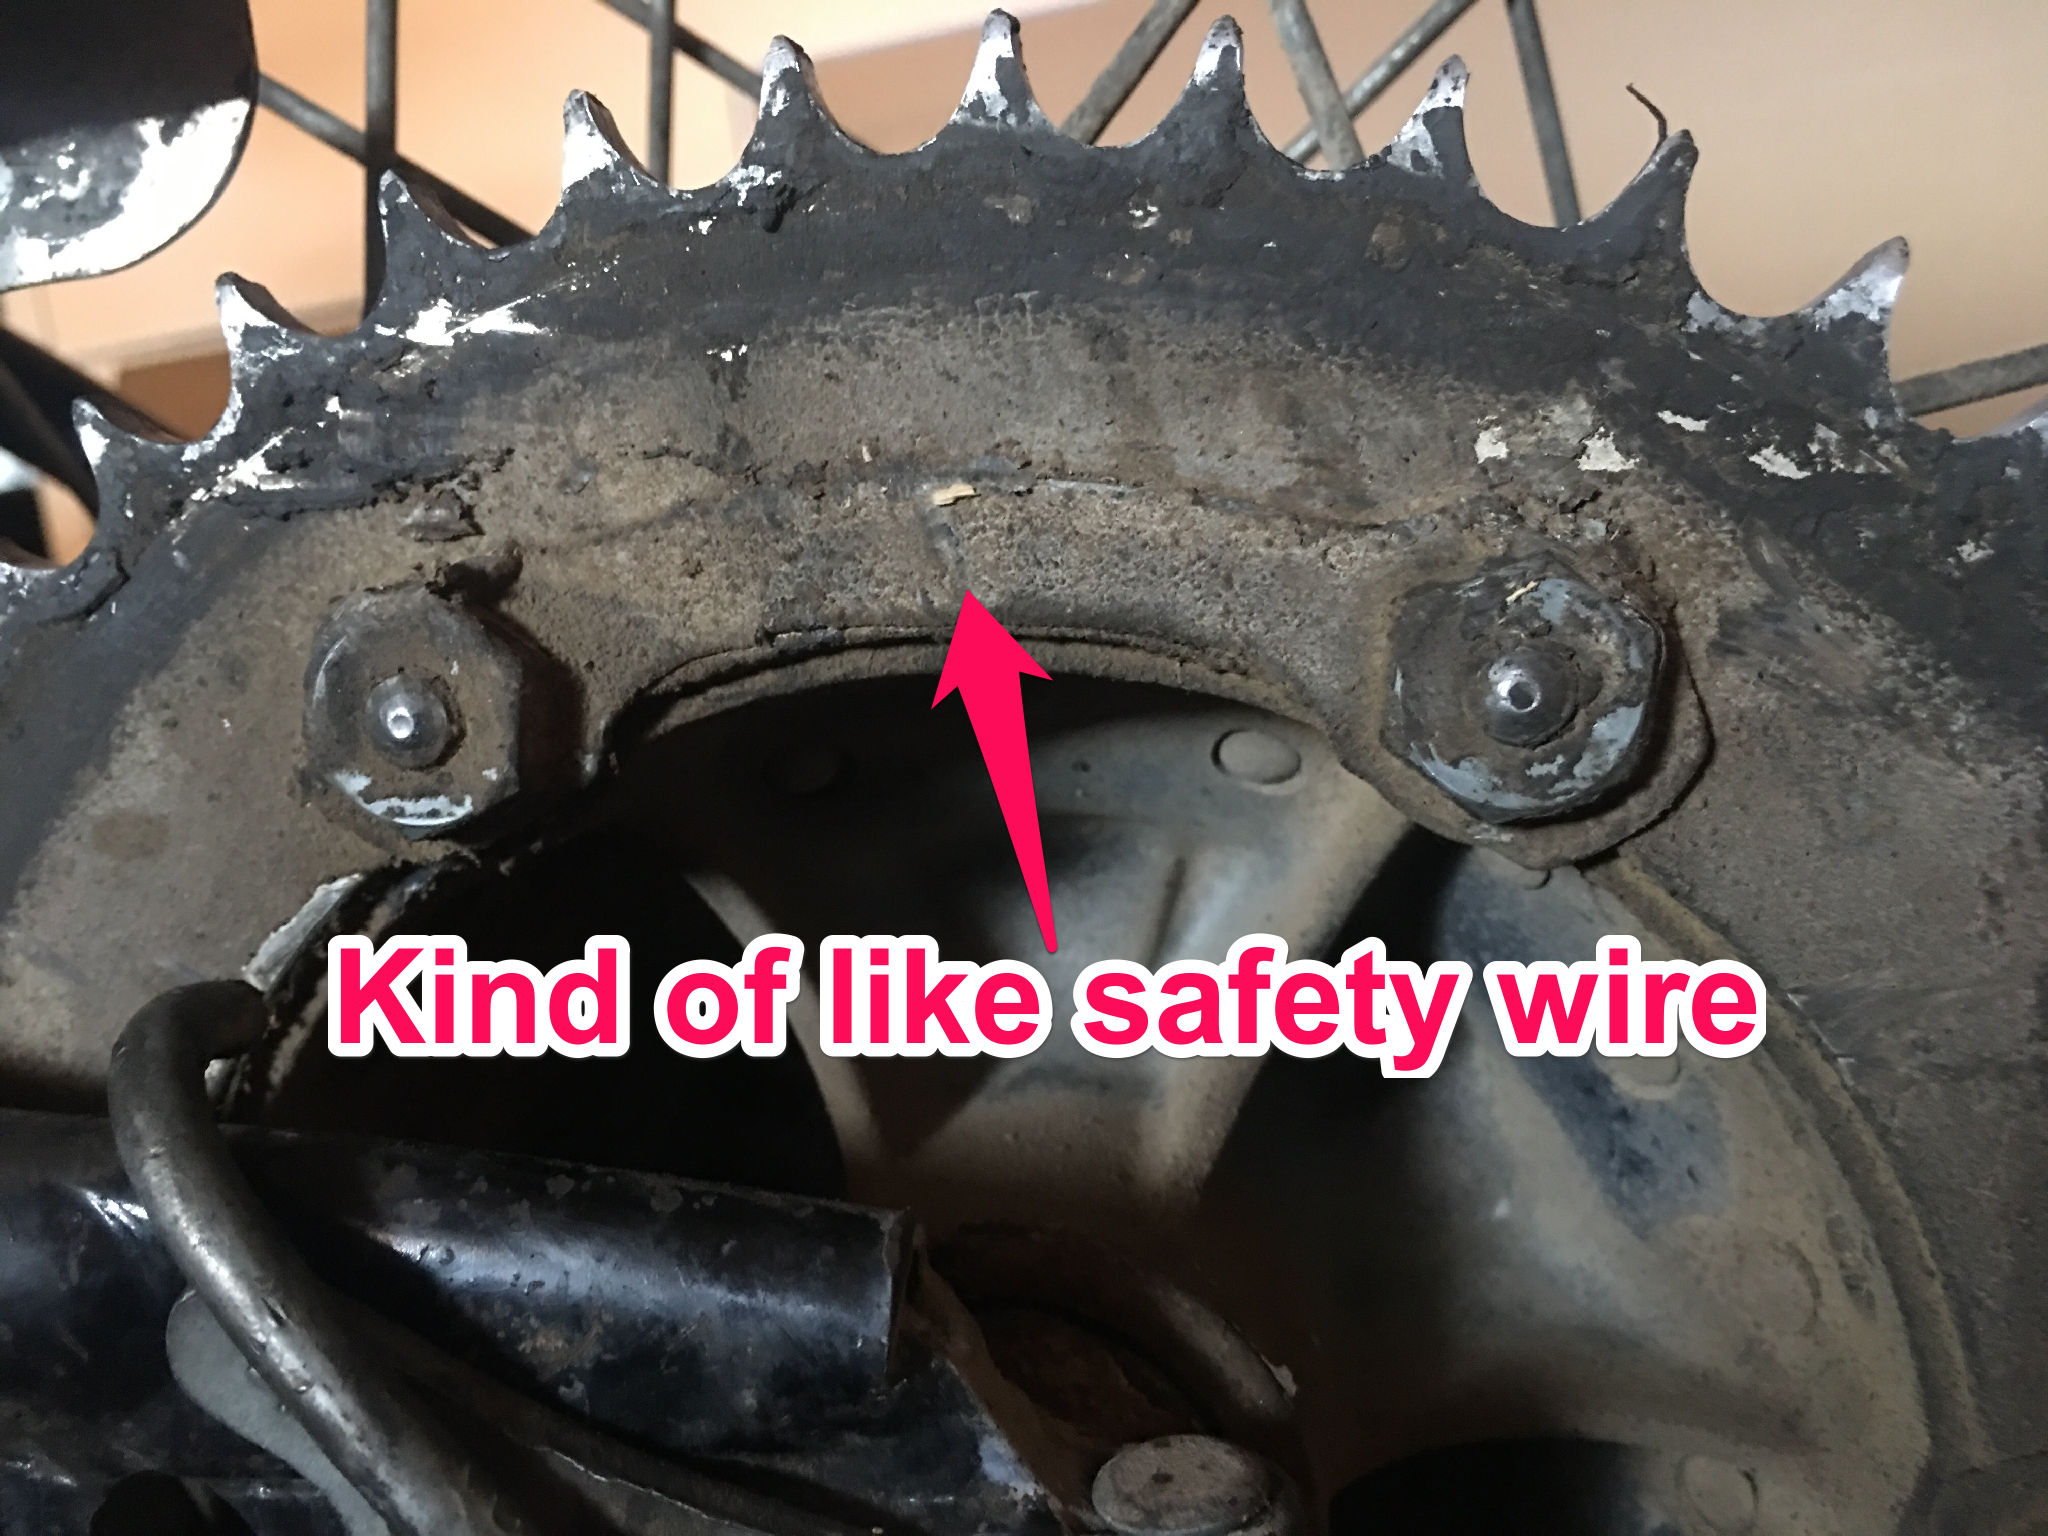
Your rear sprocket might have some type of keeper under the nuts holding it onto the rear wheel.
You’re going to have to beat the tabs back with a hammer and chisel before you can remove the nuts.
Then you can either reuse the keepers or fit the nuts with safety wire to keep them where they need to be.
You will need to remove your rear wheel in order to get the rear sprocket off.
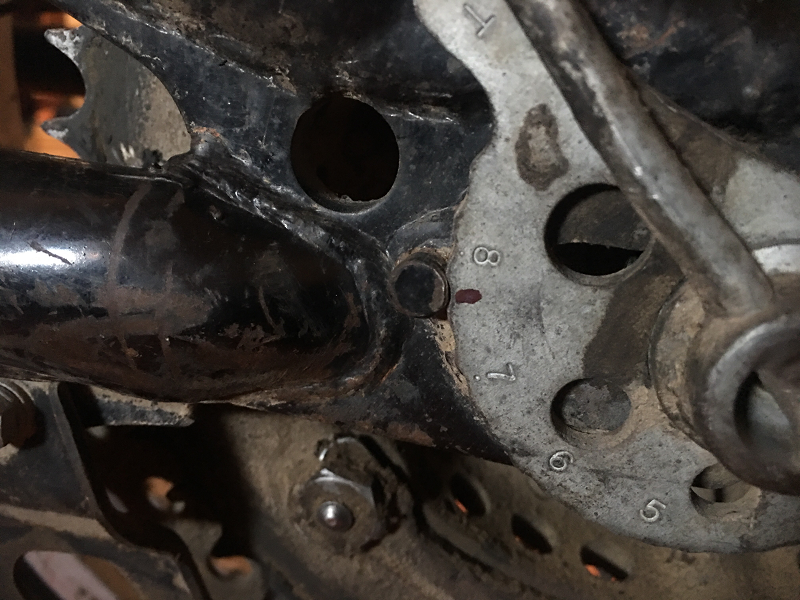
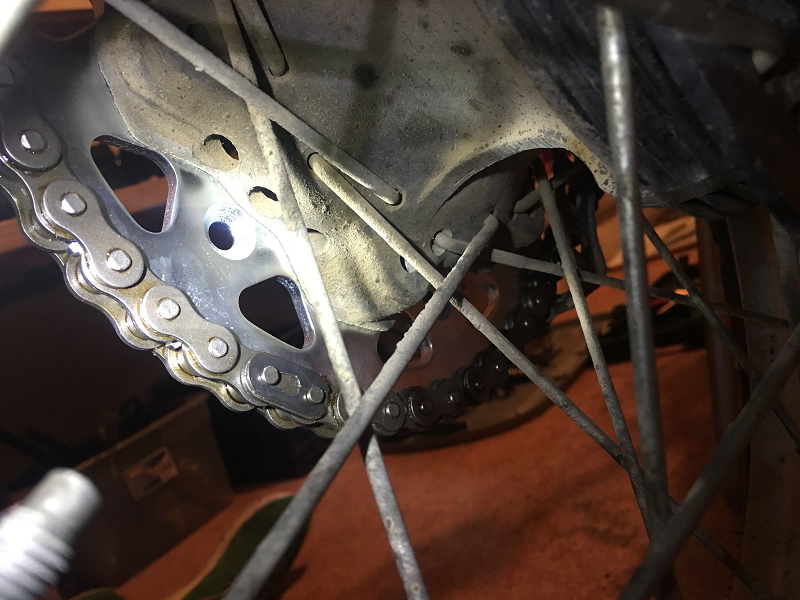
This is a close-up of the rear wheel adjusters on the ’78 Yamaha IT250.
These things are quite nice. They have divets in them to help you know where the rear wheel is positioned.
I marked them with a Sharpie to see where I started compared to where I ended up finishing. The axles have levers on them to help you torque them down by yourself, which is a nice feature for an old dirt bike to have.
They just don’t make stuff like they used to, I tell you what.
Cutting the new chain down to size
The stock ’78 IT250 came with 14-46 gearing, making for a final drive ratio of 3.29. It used a 104 link chain.
I went 2 teeth up on the rear sprocket, making for a new final drive ratio of 3.42. This final drive ratio sacrifices a little top speed for increased acceleration, which should serve me well racing vintage motocross on this machine.
I used 106 links on the new chain, which started out as a 110 link chain. I removed 4 links from the new chain. I didn’t do any calculations to arrive at this chain length. I simply started by lopping 2 links off of the chain and then test fitting it. It was really loose, so I cut 2 more links off of the chain and test fit it with 106 links.
Yahtzee. The chain was tight, but not too tight, with 106 links.
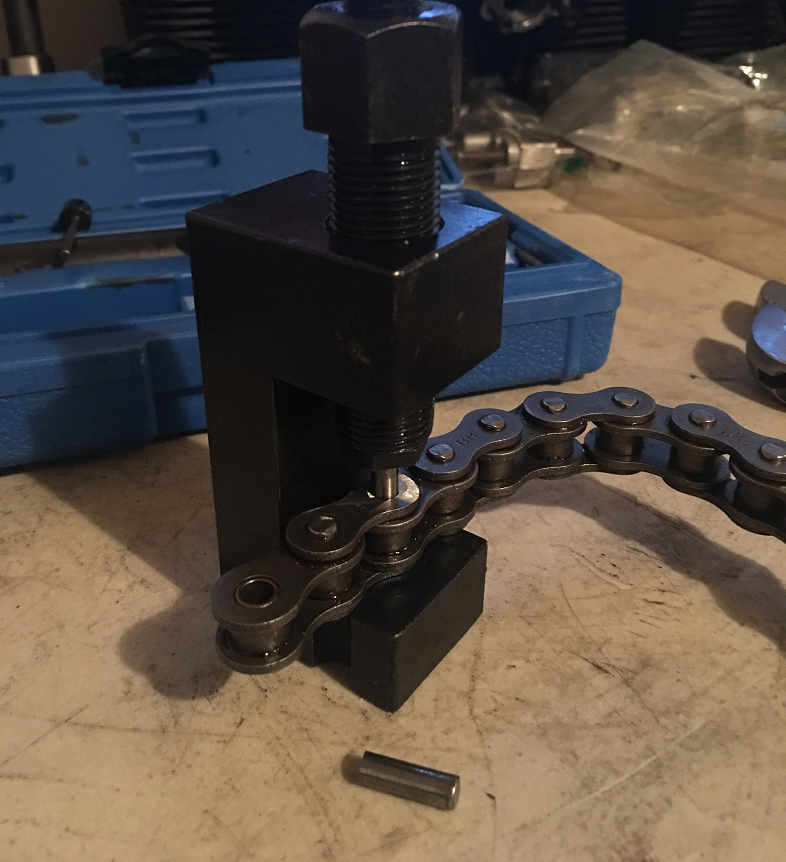
Before you remove links from a chain, always grind the pin flat against the plate. This helps the $22 Chinese-made chain breaker break the chain without bending its soft, Chinese-made pins. A good chain breaker costs four times as much, but, if you’re careful, you can get away with using something like this instead.
Also note that you can’t just remove a single link from the chain. For the master link to work, your chain needs to terminate in a way that allows you to use it.
That means that if you have to cut your new chain, you have to cut 2 links off at a time.
Fitting the new master link
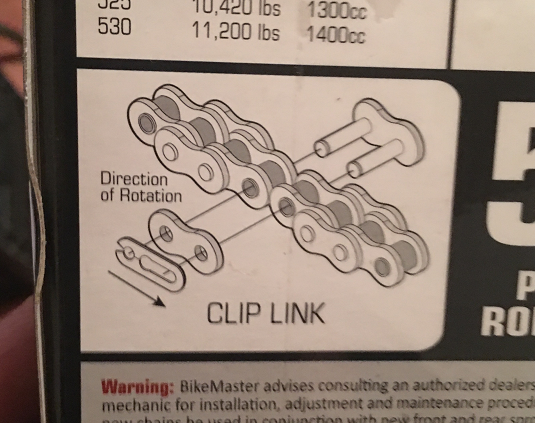
The master link goes on a certain way, according to BikeMaster, who made the chain.
The open end of the clip needs to face backwards. I use lineman’s pliers to remove and install master links. It’s kind of a neat trick. Ask about it if you’re curious.
You definitely want the clip facing backwards. As for whether you fit the clip on the left or right side of the chain, I’ve never seen it make a difference either way. As long as it’s on, you’re good to go.
Here you can see a master link installed and set the proper direction:
Now that the new chain and sprockets are installed, let’s have a look at our handiwork:
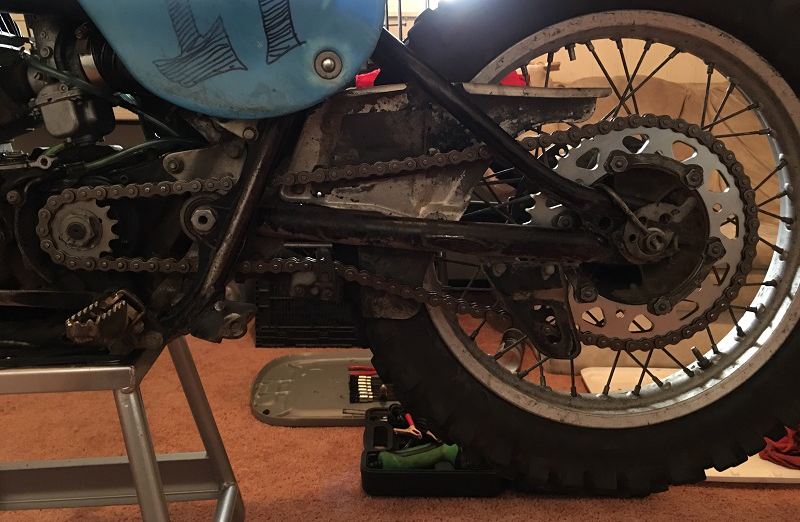
Looks good!
Aligning the chain
Now let’s have a look at the rear wheel adjusters, to see where they ended up with the new sprockets and the new chain:
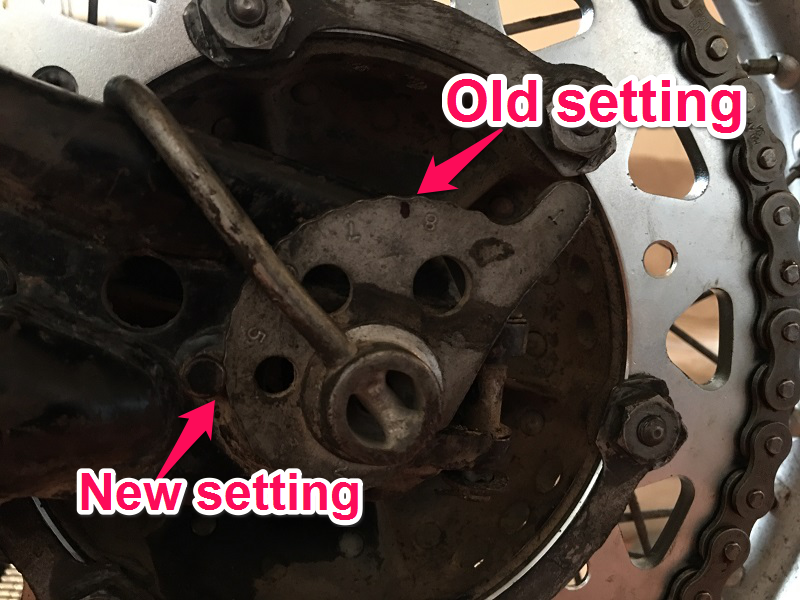
What does that picture tell us? It tells us that I decreased the wheelbase slightly, which should serve me well racing vintage motocross on this machine.
As the chain stretches, I will end up adjusting the rear wheel backwards, to add tension to the chain. I have plenty of room to move the rear wheel backwards as the chain stretches.
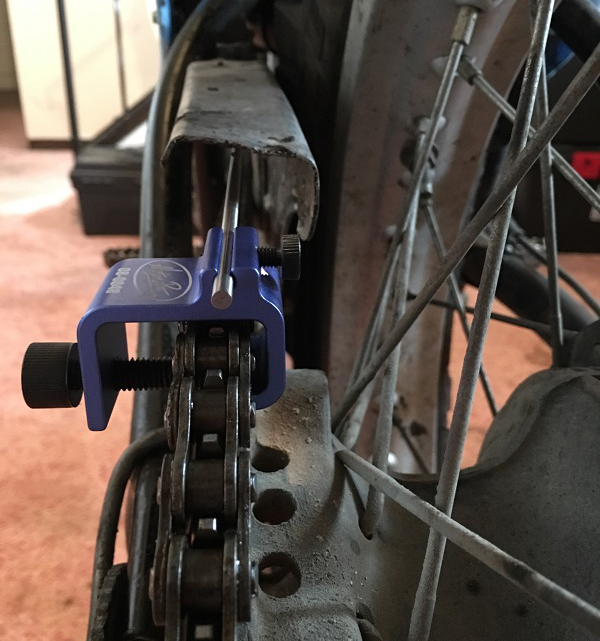
Now let’s check the chain alignment, using a handy little tool made by Motion Pro:
The very last and final step is to torque all the fasteners down.
Use the rear brake to hold everything in place.
Torque the nut for the countershaft sprocket down to 45-55 ft lbs and the rear sprocket nuts down to 15-25 ft lbs.
You can use a dab of blue loctite if you like, but once the retaining washers are bent down over the fasteners it’s unlikely that they’ll loosen up as you ride your bike.
Before you ride, remember to lube your chain and the sprockets. Once everything is torqued down and lubricated, fire up your bike and take it for a ride. As you ride the bike, be sure to check your chain slack frequently. New chains loosen up and stretch as they wear, so you’ll have to re-adjust your chain at some point after the initial installation.
More about MOTO2N:
MOTO2N is a MOBILE service, which means I come to you and repair your bike on-the-spot.
If we need parts to complete the job, I will order them and call you to schedule a second visit after they arrive.
Appointments are available Tuesday thru Saturday, sunrise to sunset.
To schedule an appointment, please BOOK ONLINE or try calling (720) 634-6935.
For more information on the services I offer, click one of these links: