Project Notes: 1977 Triumph Bonneville T140V (750cc) – Setting The Ignition Timing
About a month ago my brother told me about his machinest friend who has an old Triumph. My brother gave him my phone number, and he called me, so I went and checked it out not knowing what to expect.
The vast majority of the bikes I’ve worked on have been Japanese. I had never worked on a British machine before. The only thing I knew about them was the difference between a “pre-unit” and “unit” engine.
First Look
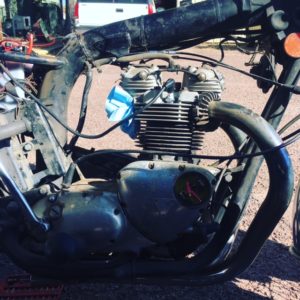
I did what I always do when I see a bike for the first time. I looked at it closely. I noticed that nobody had tried to take the engine apart. Good. I noticed the screws holding the covers on still looked to be in good shape. Also good. I put a multimeter on the battery. Dead as a doornail. To be expected. I looked inside the tank. Clean. I put a multimeter on the coils and got 4.1 ohms across both of them, if memory serves. Also good. The bike looked like it had been sitting for a long, long time. But otherwise it appeared to be complete, so I told the fellow I’d take a crack at it.
The bike looked like this:
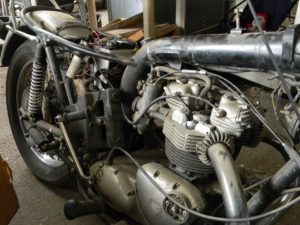
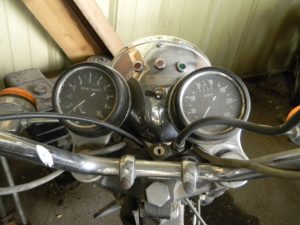
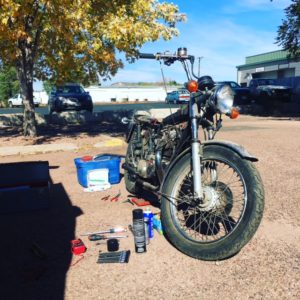
And that’s about the way it still sits. The only difference being now it has spark, and it will start and run for a few seconds on alcohol. The bike came with a box of spare parts. I went through the parts and found an electronic ignition by Boyer Bransden, complete with installation instructions.
Before I get ahead of myself, I’d like to share my “process” for bikes like this. I start by getting a rough idea of what it’s going to take to get the bike running, starting with the most expensive things first. I only agreed to work on this Triumph after verifying that it was largely complete and that the engine made decent compression. After verifying the engine had compression, I went about making the engine spark. After making the engine spark, I went about fixing the carburetors and the rest of the fuel system. I expect the bike to run well enough to ride around the block during my next session with it. You see, I don’t even think about cosmetic improvements until there’s a running, riding, somewhat safe and predictable motorcycle in front of me. Then and only then do we think about tearing the bike down to paint, polish, and futz with things to make them pretty.
Making Sparks
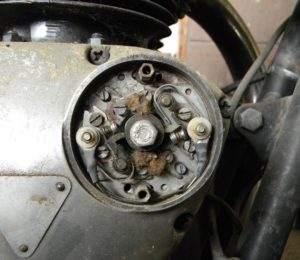
Because we had a brand new electronic ignition on hand, I opted not to fuss with the stock points and condensors.
I have experience with points and know how they work AND how to adjust them, but I don’t see a reason to monkey with them if there’s a ready alternative on hand.
Out with the points:
And in with the fancy new electronic ignition:
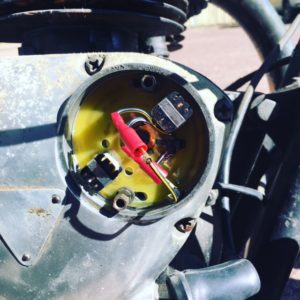
Installation was straightforward. Remove the points, replace with a stator plate and magnetic rotor, then wire in the igniter unit according to the instructions.
Electrical Kit
I carry a decent selection of electrical kit in the van, along with plenty of extra wire, so it didn’t take much to get the engine sparking.
You also need proper connectors to rig everything up.
2, 3, 4, 6, and 8-pin Connectors
And some extra wire and heat shrink, along with electrical tape.

Making Noise
Getting the bike to spark was my first big success with it. So I sprayed some alcohol in the carb throats and tried kicking it. After 15 or so kicks, I pulled the spark plugs. They were a little wet, which meant that my sparks weren’t happening at the right time. I figured something had to be off.
The procedure for setting the timing is simple enough. I like to put my thumb over the spark plug hole to find the compression stroke, then use a screwdriver to get the piston close to TDC. After verifying the little pointer inside the left engine cover was on its mark, I aligned the mark on the ignition rotor with the “clockwise” hole on the stator plate. That’s all it took to get the ignition sparking.
Initially I set the ignition timing with the #1 cylinder. This is wrong. Apparently on old Triumphs, you have to set the timing with the #2 cylinder. I guess that only makes sense given the positive terminal on the battery is grounded to the frame on these things, too. Everything is backwards in England, aye.
After re-timing the engine using the #2 cylinder instead of the #1 cylinder, the bike started easily and ran until it exhausted the meager supply of alcohol I sprayed in the carbs’ throats. That was the second big success.
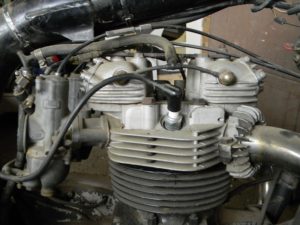
After verifying that the bike sparks AND runs, however briefly, I set about looking at the carbs. This was my first time with Amal carbs. Fortunately, they’re even simpler than the Keihins and Mikunis I’m used to. They look like this:
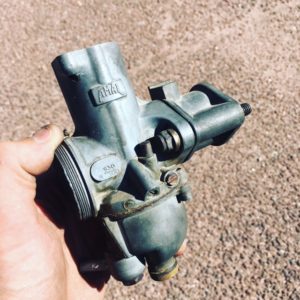
I’m pretty darn sure they’re 900-series, 30mm, Amal concentric carburetors. Good news! They’re just as complete as the rest of the bike! They even appear to have been stored dry, without gas in them. One of the manifold gaskets fell apart as I removed the carbs, and one of the float bowl gaskets fell apart as I disassembled them.
I found a very reasonably priced parts source at The Bonneville Shop and ordered what I needed right there on the spot.
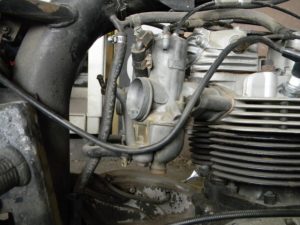
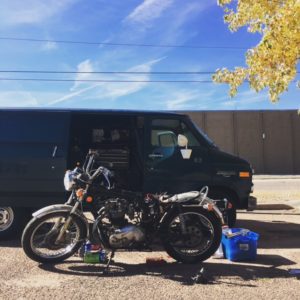
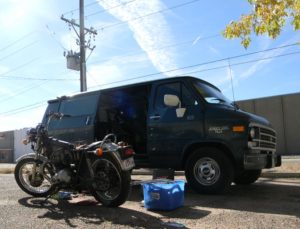
More pics of the bike:
I fully expect it to run well enough to take for a ride the next time I work on it. This weekend! Exciting!
If you have an old bike you’d like me to bring back to life, give me a call at (719) 565-9295.